Showing posts with label nursery. Show all posts

Saturday, October 2, 2010

New graphic designs!

So... I've been busy designing lots of cute new things. Mainly birth announcements and a couple of invites. If you're interested in a custom design please do get in touch via my website www.joyessdesigns.com. I hope to be starting up a brand new etsy shop dedicated to graphic designs very soon. Watch this space! A present for our niece on her 1st birthday...

 ... and then a matching (ish) one for her brother

Ellie's finished product can be seen at the end of this blog over here


a present for a family member to give to friends who had twins

Monday, August 16, 2010

ellie's nursery

Our dear friends Peter and Lisa asked for some help with their nursery for their baby #3. They have 2 seriously beautiful girls already and so they thought that for bub #3 it might be nice to revamp all the old baby stuff and that's where I came in.


The first step was to repaint all the old nursery furniture (cot, change table and some picture frames) in crisp clean white. Pete borrowed a high pressure spray and did an amazing job on these! The next step to making the room feel new was to rearrange the furniture from it's old positions. Let's go on the tour!
Pete and Lisa didn't know if they were having a boy or a girl, so we went for primary colours minus the yellow as they already had the green feature wall painted and they liked the idea of bright and cheery colours. Ok, i know you can see a bit of pink in there too, that's because they had a GIRL! So rather than "baby-to-be"'s room, it's Ellie's
I made these elephant canvases after my first meeting with Pete and Lisa and they became somewhat the inspiration for the rest of the room. I love the happy coincidence that there is a song called "Ellie the Elephant!"

The canvases (fabric included) cost no more than $5 each and the "dream" was only $3 (from Spotlight) and I painted it white.
One of my FAVOURITE things in the room! Ellie's big sisters are Charlize (5) and Brianna (3) and they made their special contribution to the room with these handprints. Ellie's will pop on the bottom when mum and dad can pry her tiny hand out of a fist! (she is only a couple of weeks old!)
This cute mini alarm clock only cost a few dollars and it's not only a cute addition to the room , but a practical one too... perfect for counting the minutes when feeding.
The feeding corner. Complete with chair from Ikea for $35, cushion and throw from The Reject Shop for $18, giant rick rack trim for curtains for $2 a metre.
How great does that cot look! Excellent job Pete. 
I made this "grow" artwork for about $3 (This is one of the frames that Pete repainted). I think these artworks (or something like them) are going to become a signature for me in rooms I help out with. You can see a similar one here in Natalie's Nursery. The lamp I picked up for $15 and added the rick rack to match the curtains and lantern above the cot.The clothes hooks were $2.50 from a local $2.00 shop and were a hideous dark wood stain. Nothing a few thousand coats of red paint couldn't fix!
A final look back at this lovely room. Overall, including the purchase of those Billy shelves from Ikea, the whole makeover came in at under $200. A great combination of creative thinking, bargain hunting and elbow grease!
And here is precious Ellie, sleeping peacefully in her cot. Isn't she gorgeous?
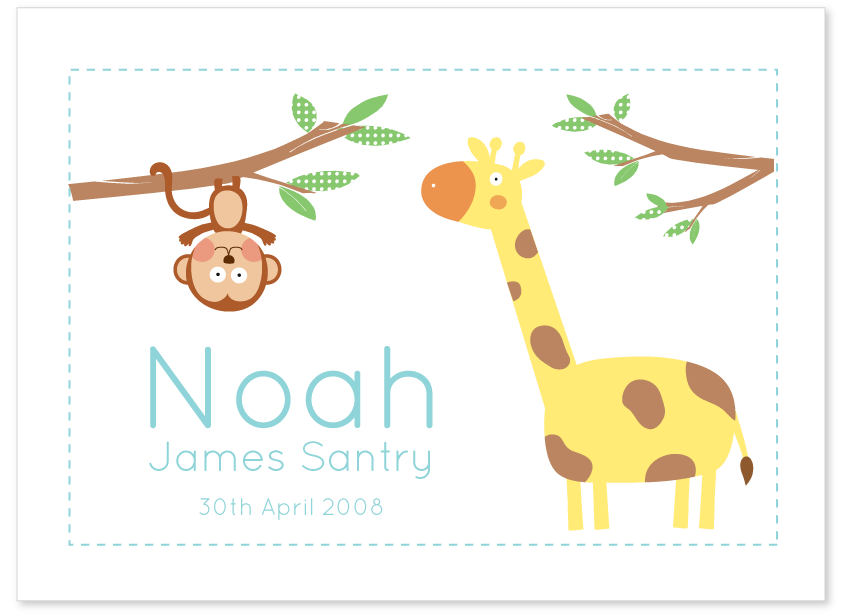
And finally, here is our present for Ellie. I designed this baby announcement especially for her. I think Lisa is going to put it up above Ellie's cot. Cute.

Wednesday, July 14, 2010

Tuesday Afternoon Mobile

So on Tuesday I picked up a new paper cutter thing (scrapbookers, feel free to remind me of the proper term!) which cuts a beautiful 2 inch circle perfectly! I had a whole bunch of paper lying around so thought I'd put my cutter to good use and cut it all up... but what does one do with a pile of paper circles? 

hmmm... find a stick, glue, and some string and ta-da! A custom mobile!


of course... there are 2 problems.. 

1) I have a boy child, not a girl child.. so probably not going to match the decor in his room.
2) If i wanted to sell it on Etsy I'm not sure the stick from the backyard would do too well through customs!

Oh well, any takers for their little girl's room? Would love this to find a new home!

Sunday, June 20, 2010

Natalie's Nursery


I'm sooo excited to share this room with you! My friends Richard and Clare just had their 2nd child, a daughter and sister to Josh - Natalie. I'm yet to meet her, but she is coming home from the hospital today, so you get to see her room for the first time on the same day she does! Here is the preview I gave of this room recently.

I had so much fun helping Clare (and Richard!) design this nursery. Clare was pretty sure she was having a girl, so we took the gamble and went girly.. as long as it could quickly be changed to blue for a boy! Because this was baby #2, all of the furniture was ready to be used again, but it was all the pretty things I helped with. The best part of it all was making a gorgeous space for very little cost.


We first chose this soft aqua colour for the wall for it's cool, calming effect and because if it was a little boy that popped out and not a girl we though aqua could very easily become a boy colour!


Clare loved the idea of having a tree wall decal, but didn't love the cost that many of them were, so my solution was to borrow an overhead projector, trace out a tree and then paint it white. It only took a couple of hours and as we were able to use the white ceiling paint that Richard had used, it cost us a whole lot less!
The little white lamp Clare found at Kmart for $10 (I think!) and we trimmed the edge with pom poms.


We also attached pink pom poms onto the edge of the blind with removable double sided tape so as Natalie grows out of them we won't have ruined the blind when they need top be removed. The length we needed cost about $4.00. Such an affordable way to customise some boring blinds!


I made this special piece of art for the princely sum of $8.00! The frame with white mat cost $5 from Big W, the butterfly was a $2.50 iron on decal also from Big W, the material was a remnant from another project and the letters probably didn't even cost the left over 50¢ - they are felt stick-on letters I found in Spotlight.


Clare also loved the idea of bunting in the room, but we both felt that the triangular flags usually used in bunting didn't suit the rest of the room, so she whipped up these crescent shaped ones - I love them!
The white shelf was a spare found in Clare and Richard's garage - painted by Clare in that trusty white ceiling paint.


If you've been following my blog, this letter will look familiar... you may have seen a "J" for "Jonty" over here. This time I chose to emphasise the little girl in pink rather than keep it all the one colour.


And here is a final look back at this lovely room. Oh! i forgot to mention the embroidery hoops on the tree earlier. To inject some extra colour and pattern into the room we filled embroidery hoops with cute prints - I thought they made some pretty "fruit" on the tree and were a nice alternative to canvases covered in material. The gorgeous linen ad mobile are hand-me-downs from Clare's sister - Osh Kosh from the US! What a lucky find and it suits the room perfectly!

More nursery and room photos to come when I get around to photographing some of the other people I've been to visit and help out. Hope you've enjoyed and been inspired by this visit!


UPDATE!!

Just got this gorgeous photo of Natalie in her new bed. So Sweet!!


Thursday, June 10, 2010

The Little Man's Room

Well, officially only 3 or so weeks left in our little townhouse. We sold it about 3 weeks ago and are now looking for somewhere to rent until we find the "perfect" (is there such a thing?) house to buy. We saw a great house tonight and fingers crossed our application will be accepted.. but it's all a bit bittersweet. I'm very excited to be moving, but a bit sad about leaving our Little Man's room behind. I went into full on nesting mode before he came along and this room had lots of planning.

*sigh*

But I AM looking forward to making a new room just for him. In the meantime I thought I'd share some old pics of his room before it is no longer.


Welcome to Little Man's room... I guess it's no secret what his name is now!

This room started off with just the green stripy wall and once we had our boy i introduced the blue and the red.

In my "nesting" state I made the monkey canvas and I had the coathanger hanger custom made by lilafrances on etsy.


Good ol' Ikea! Here you can see the often used in nurseries expedit bookcase and poang chair. Often used for a reason! They are both so reasonably priced and the chair is perfect for feeding while the bookcase has so many uses! Mine, as you can see, is also doubling as the change table. I custom made the cover for the headrest and then added a matching cushion to finish the seat off. Nothing like customising Ikea!


Tuesday, June 8, 2010

DIY change table


I've just finished helping some friends design a nursery for their new baby (due any day now - exciting!). They used a set of 4 drawers with a change mat on top for their first child (unfortunately I don't have a before photo), and wanted to use it again this time around. Dad had the complaint, however, that the drawers were quite tricky to open up when trying to change baby's nappy.

I had a look at it and suggested taking out the top 2 drawers, popping in a piece of wood as a shelf and adding some more easily accessible baskets. I sourced the baskets ($8 each - bargain!) and Dad had the job of removing the bits from the old drawers.

And here is the (almost) finished product:


All that's left to do is paint the interior of the empty space. Very cute and clever I think!

More pics of the nursery to follow in a week or so. Lots more budget friendly ideas to come!


LinkWithin

Related Posts with Thumbnails